Military Wallpaper - part 1
Create a new file (File>New), having 1280x1024 px and 72 dpi.
Choose the Rectangle Tool (U) to draw the background of the picture we want to get on the final stage:
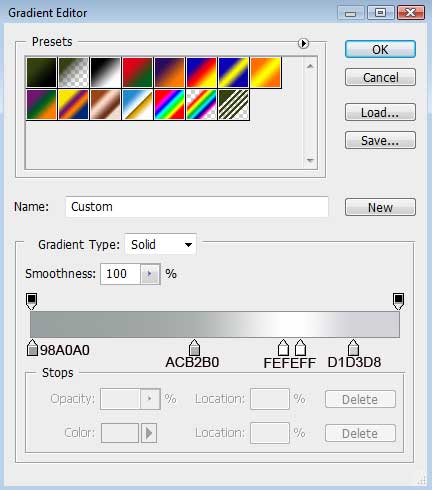
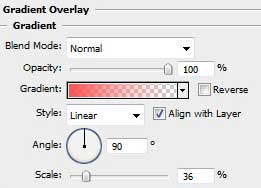
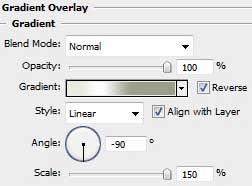
Select the next parameters for the new made layer by making a mouse click on the processed layer on the layers’ panel: Blending Options>Gradient Overlay
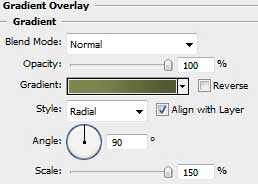
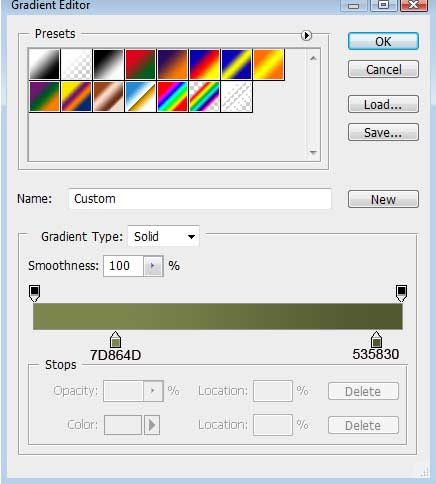
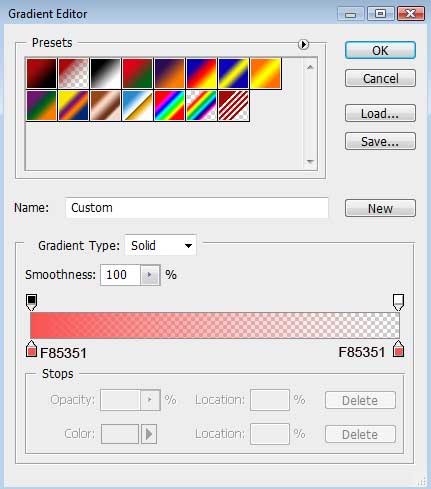
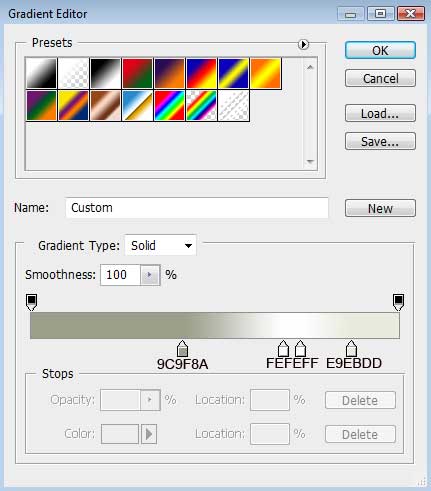
Gradient’s parameters:

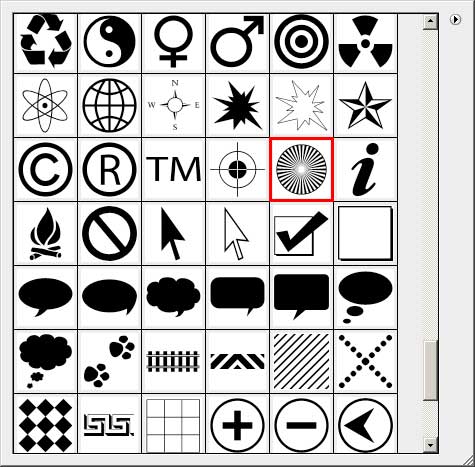
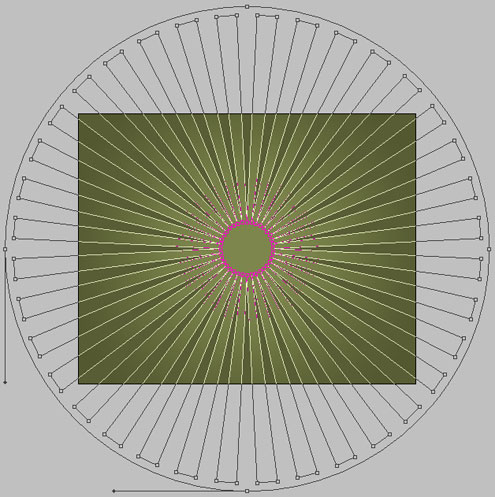
Select now the Custom Shape Tool (U)
Custom Shape Tool (U).
 You use the shape tools to draw lines, rectangles, rounded rectangles, and ellipses in an image. In Photoshop, you can also draw polygons and create custom shape libraries to reuse and share custom shapes.
'); return false">Custom Shape Tool (U) for drawing several rays colored with #595D35. Choose the appropriate pattern from the table demonstrated next picture.
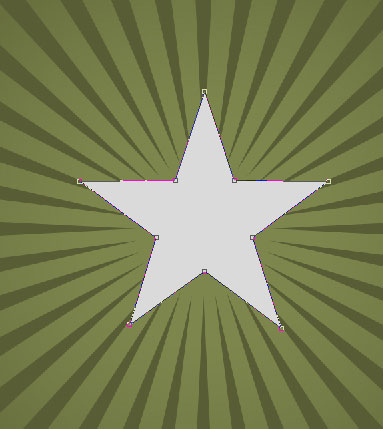
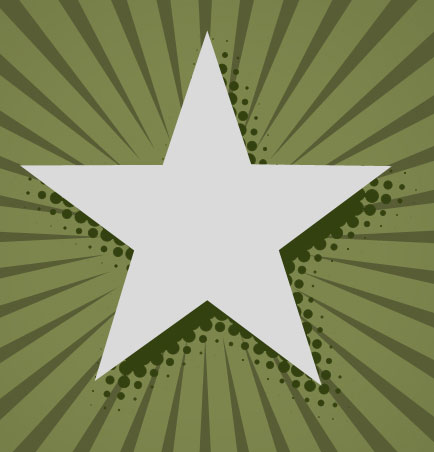
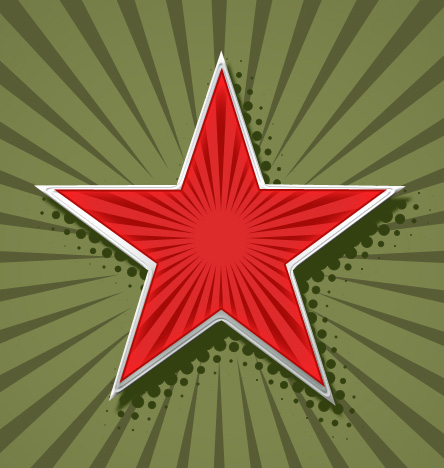
Use the last applied tool to draw a small star. Select the Convert Point Tool to represent the inside tops of the element. After that we shall use the Free Transform option to narrow them uniformly.

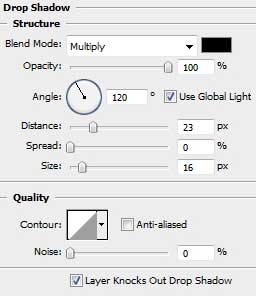
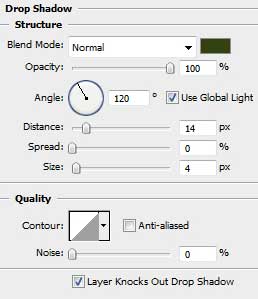
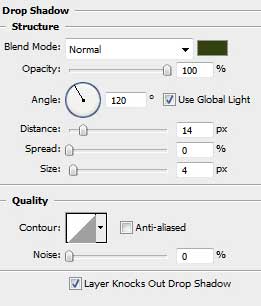
The layer’s parameters: Blending Options>Drop Shadow
Military Wallpaper - part 2

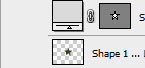
Make a mouse click on the same layer on the layers panel, choosing Drop Shadow option and then select Create layer option. The shadow will be represented on a separate layer.
Create a new layer that will be situated above the shadow’s layer (on the layers’ panel). After that, select the Paint Bucket Tool (G)
Paint Bucket Tool (G).
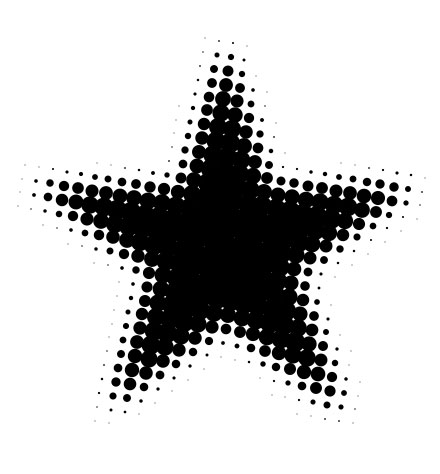
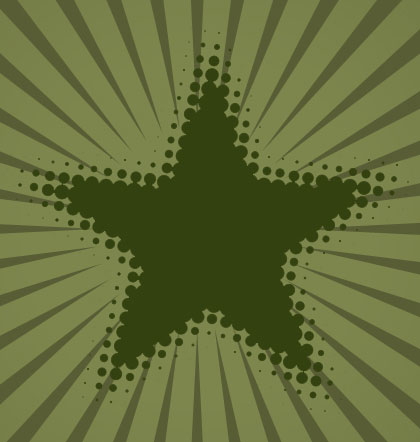
 The Paint Bucket tool fills adjacent pixels that are similar in color value to the pixels you click.'); return false">Paint Bucket Tool (G) to paint it in white color. Press CTRL button to mark out the shadow’s layers and the white one, merging them together (CTRL+E). Apply for the merged layers a new option: Filter>Pixelate>Color Halftone
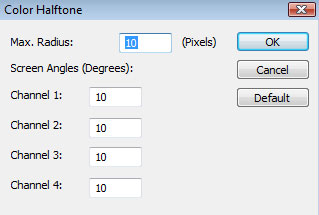
Mark out the white background, using Magic Wand Tool (W) and press Delete button.
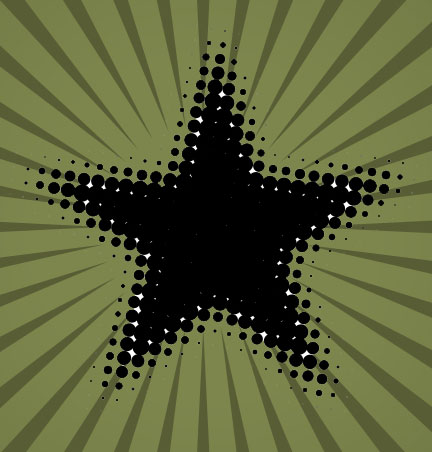
Now we shall choose Lock transparent pixels option by making a mouse click on the same layer we work with on the layers’ panel.

Select a standard brush to paint the shadow with the color #334110
Get back to the star’s layer:
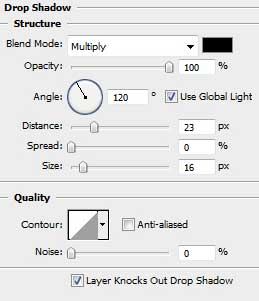
The layer’s parameters: Blending Options>Drop Shadow
Military Wallpaper - part 3
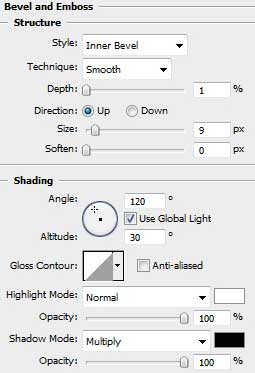
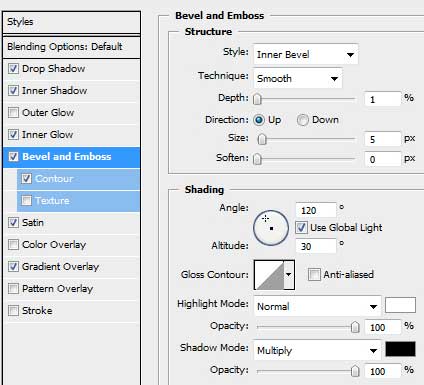
Blending Options>Bevel and Emboss
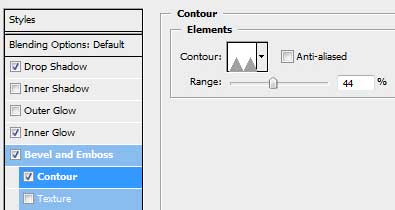
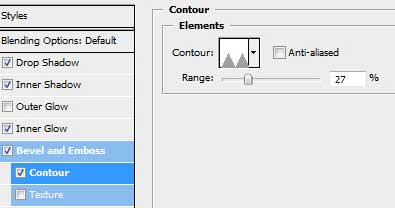
Blending Options>Bevel and Emboss (Contour)
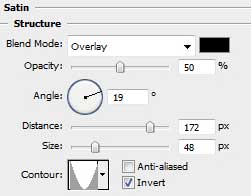
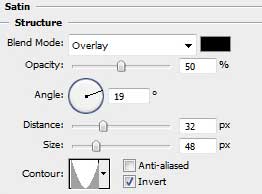
Blending Options>Satin
Blending Options>Gradient Overlay
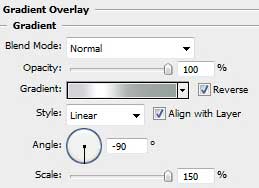
Gradient’s parameters:

Make a copy of the star’s layer and select Free Transform option to make the copy smaller, changing also the layer’s parameters. The layer’s color in this case is #DD2A2B

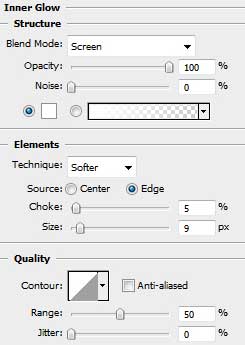
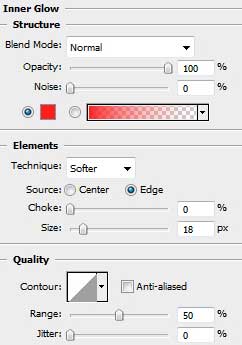
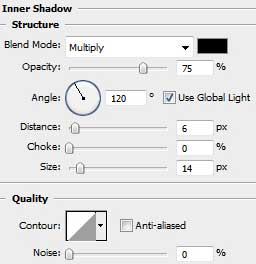
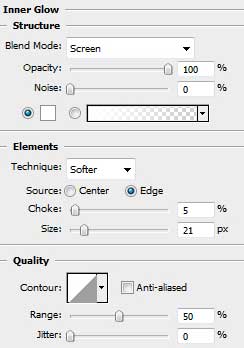
The layer’s parameters: Blending Options>Inner Glow
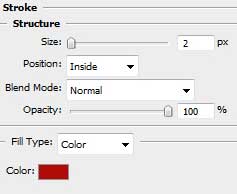
Blending Options>Stroke
Military Wallpaper - part 4

Apply again the earlier chosen instrument – Custom Shape Tool (U)
Custom Shape Tool (U).
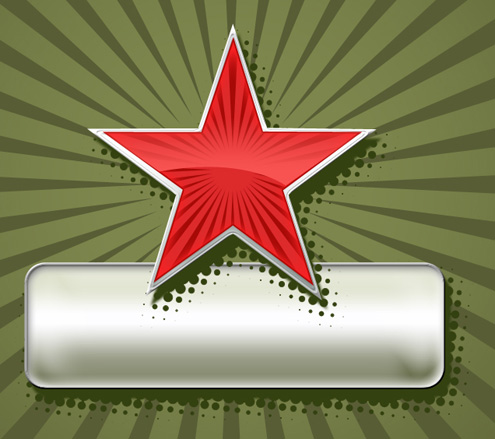
You use the shape tools to draw lines, rectangles, rounded rectangles, and ellipses in an image. In Photoshop, you can also draw polygons and create custom shape libraries to reuse and share custom shapes.'); return false">Custom Shape Tool (U) to represent the rays on the star. The rays’ color is #A60A07

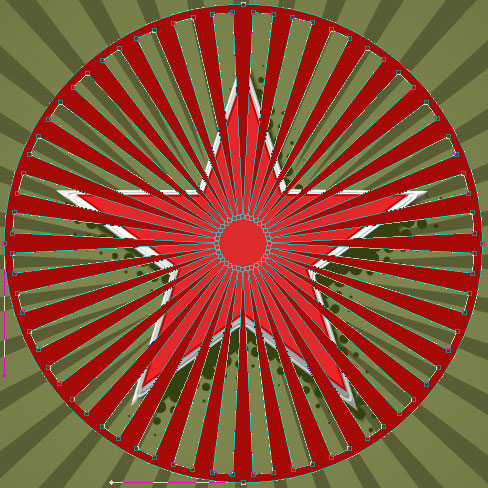
Press Alt button and make a mouse click between the rays’ layers and the star’s upper layer for the rays to be applied in the star’s limits.
Make a copy of the earlier made layer with the red star and place it above the other layers on the layers’ panel. Select also for the copy Delete Anchior Point Tool to erase on the bottom part several tops. The Convert Point Tool will be helpful in making right corrections on the element’s shape:

The layer’s parameters: Fill 0%
Blending Options>Gradient Overlay
Gradient’s parameters:

Select now the Rounded Rectangle Tool (U)
Rounded Rectangle Tool (U).
 To reshape the corners of a rounded rectangle, select the rounded rectangle tool and select the rectangle. Extra selection handles appear inside the rectangle corners. Dragging an inside handle toward the center of the rectangle to make it more rounded; drag it toward the outside of the rectangle to make it less rounded.'); return false">Rounded Rectangle Tool (U) (radius 30 px) to insert the text’s selection table. This layer should be situated under the layers belonging to the star and its shadow (on the layers’ panel). The color of the selection is white.
Military Wallpaper - part 5

Now we shall make the same operations we’ve made for the star’s shadow (I mean dividing the layers, merging together the shadow’s layer with the white one, applying the filter, erasing the white background on the shadow’s layer and painting out the shadow). This shadow’s color is the same with the star’s shadow.
Get back to the text’s inscription:

The layer’s parameters: Blending Options>Drop Shadow
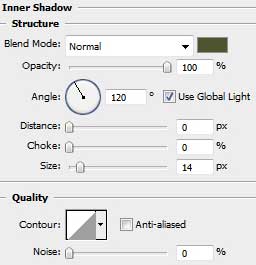
Blending Options>Inner Shadow
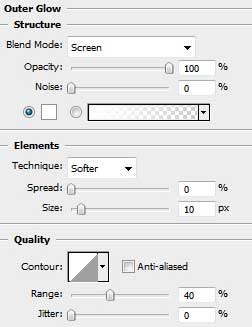
Blending Options>Outer Glow
Blending Options>Bevel and Emboss
Blending Options>Bevel and Emboss (Contour)
Blending Options>Satin
Military Wallpaper - part 6
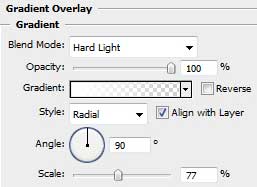
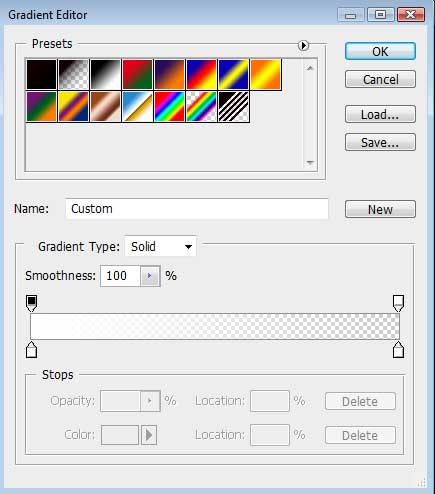
Gradient’s parameters:
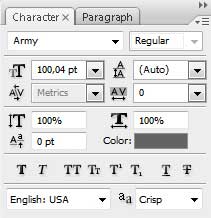
Insert the text next step. This layer should be placed above the table’s selection, but lower than the star’s layers and its shadow (on the layers’ panel).

The layer’s panel: Blending Options>Inner Shadow
Blending Options>Outer Glow

Choose the Ellipse Tool (U)
Ellipse Tool (U).
 Use the ellipse tool to draw ovals and circles. To draw a circle, hold down the Shift key while dragging. Double-click the ellipse tool to open the Color inspector.'); return false">Ellipse Tool (U) to represent a highlight. This layer should be placed lower than the star’s layers and its shadow (on the layers’ panel).
The layer’s parameters: Fill 0%
Blending Options>Gradient Overlay
Military Wallpaper - part 7

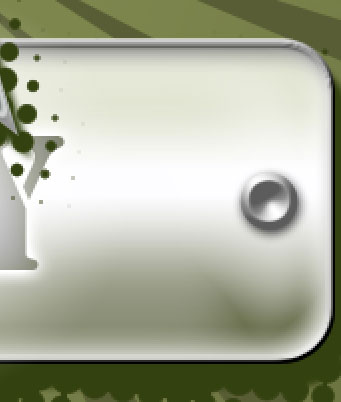
Select on this stage the Ellipse Tool (U)
Ellipse Tool (U).
Use the ellipse tool to draw ovals and circles. To draw a circle, hold down the Shift key while dragging. Double-click the ellipse tool to open the Color inspector.'); return false">Ellipse Tool (U) to draw a kind of rivet, colored with #8B8B8B, placing it the same way shown below: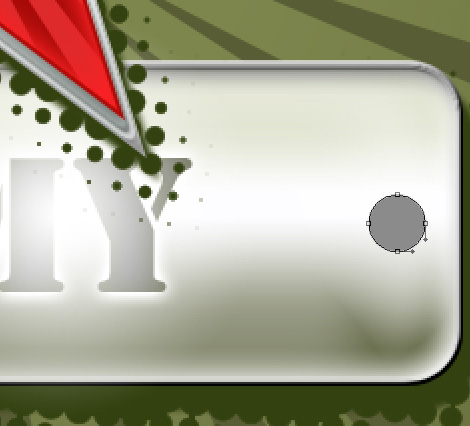
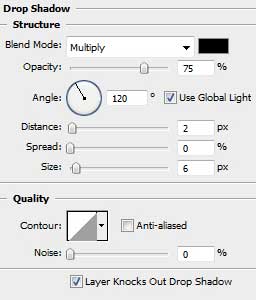
The layer’s parameters: Blending Options>Drop Shadow
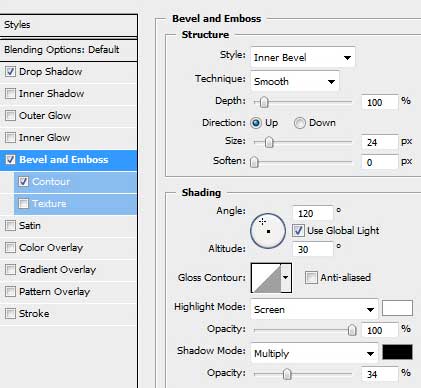
Blending Options>Bevel and Emboss
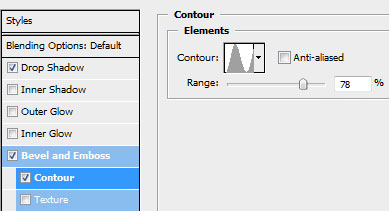
Blending Options>Bevel and Emboss (Contour)
Make a copy of the last made layer and choose Free Transform option to place the copy, like it is indicated below:

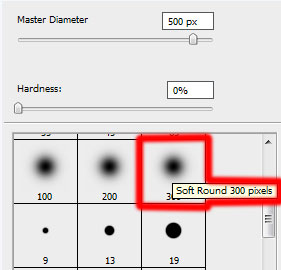
Next we shall use a standard brush of white color to draw a kind of frame, like the one demonstrated next picture:

Natural Brushes

Take the Eraser Tool (E)
Eraser Tool (E).
 The Eraser tool changes pixels in the image as you drag through them. If you\'re working in the background or in a layer with transparency locked, the pixels change to the background color; otherwise, the pixels are erased to transparency. You can also use the eraser to return the affected area to a state selected in the History palette.'); return false">Eraser Tool (E) to clean out the picture’s edges, applying the same brush:
The picture is finished!